Zoom now offers live captioning and transcription for all Zoom sessions as part of its normal service. This feature is available to all Zoom users at the University of Mississippi. The campus Zoom administrator has enabled the settings for most UM-managed Zoom accounts.
Enable Captions & Transcription at the Beginning of EACH Zoom Meeting or Webinar
IMPORTANT: The Zoom host must enable the captions for EACH meeting or webinar following the steps below in order for meeting or webinar attendees to view captions.
Meeting or Webinar Host
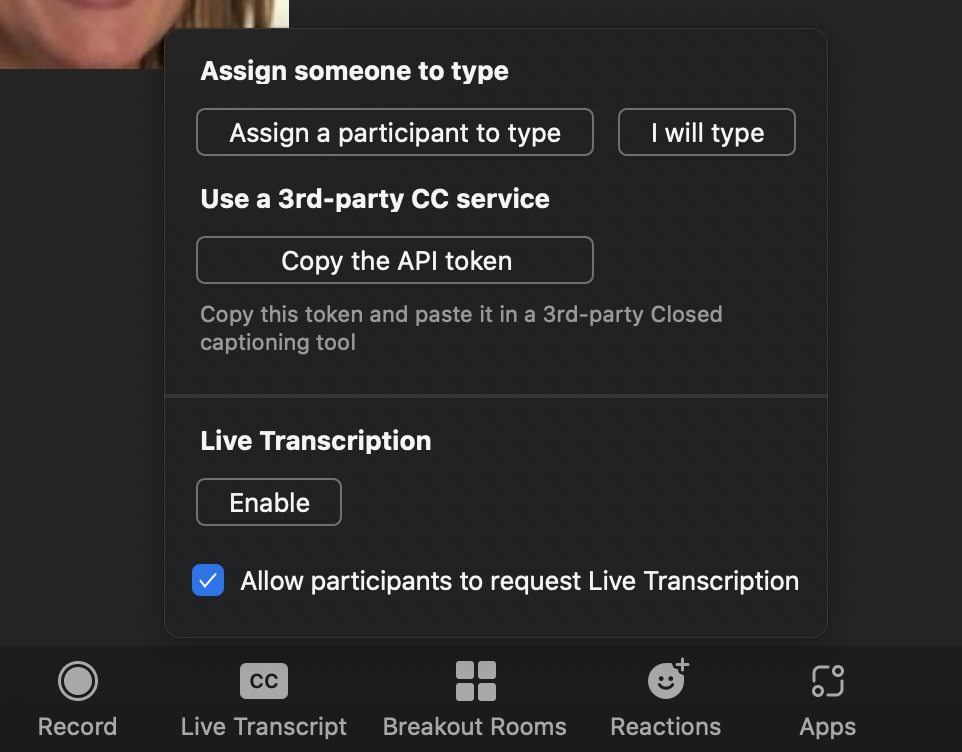
- Upon starting each new meeting, click “CC Live Transcript” from the options at the bottom of the Zoom window.
- Next, choose the “Enable Auto Transcription” option under the Live Transcript heading to show captions for all participants.
- Leaving the default for “Allow participants to request Live Transcription” allows students or meeting participants to request that captions be enabled should the host not have them enabled.
Meeting or Webinar Participants
- Individual meeting participants can control the size of the subtitle by clicking the arrow next to “CC Live Transcript” and choosing “Subtitle Settings.”
Accessing and Saving a Transcript DURING a Zoom Meeting or Webinar
- After starting the captions in a Zoom meeting or webinar as described in the steps above, a small arrow will appear next to the CC button on the Zoom toolbar.
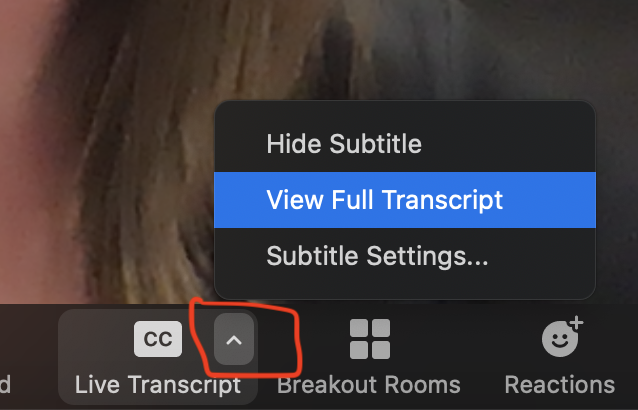
- Upon clicking the arrow, three choices are available as displayed in the image above: Hide Subtitle, View Full Transcript, and Subtitle Settings.
- Choose “View Full Transcript” to open the transcript of the Zoom meeting on the right side of the Zoom window.
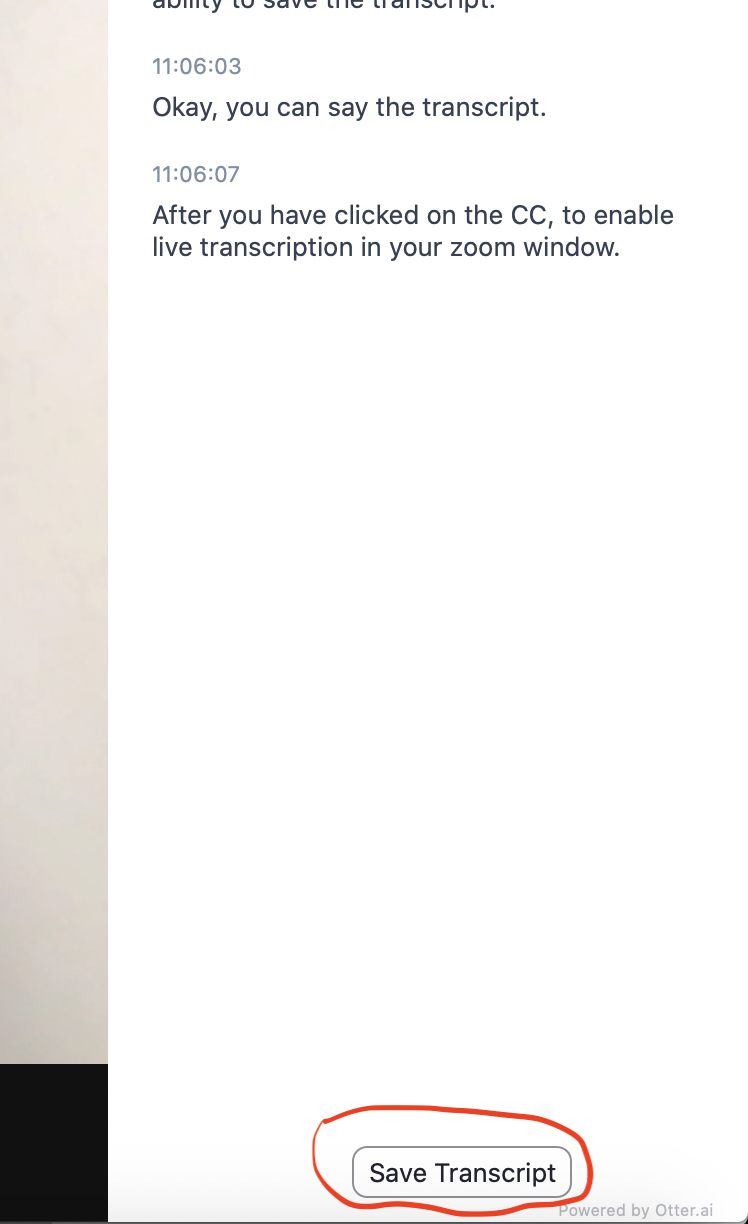
- At the end of your meeting, click “Save Transcript.” You will want to wait until the end of your Zoom session to save because it only saves up until the moment that you select “Save Transcript.” It will not save any future information in the meeting.
Accessing and Saving a Transcript AFTER a Zoom Meeting or Webinar
- IMPORTANT: You must save your Zoom recordings to the Cloud to have access to this feature.
- Log in to your Zoom account at olemiss.zoom.us using your WebID and password.
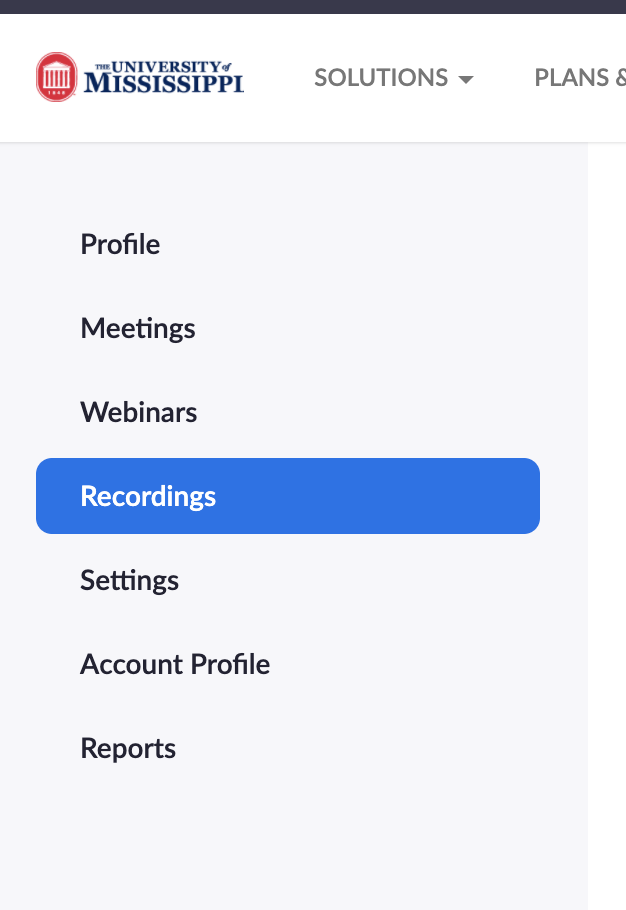
- Choose “Recordings” from the menu on the left side of the screen.
- From the list of recordings shown, choose the meeting or webinar recording for which you wish to retrieve a transcript.
- Select Audio Transcript to download the transcript of the meeting or webinar.
Enable Captions & Transcripts in the Zoom Account Settings
PLEASE NOTE: The UM Zoom administrator has enabled these settings at a university account level, so these settings should be set in your Zoom account. However, if you do not have the option to Enable Auto Transcription as shown above, please follow the steps below to enable the service in your account.
-
- In your browser, sign in to the Zoom web portal (olemiss.zoom.us)
- Choose “My Account” in the upper-right corner.
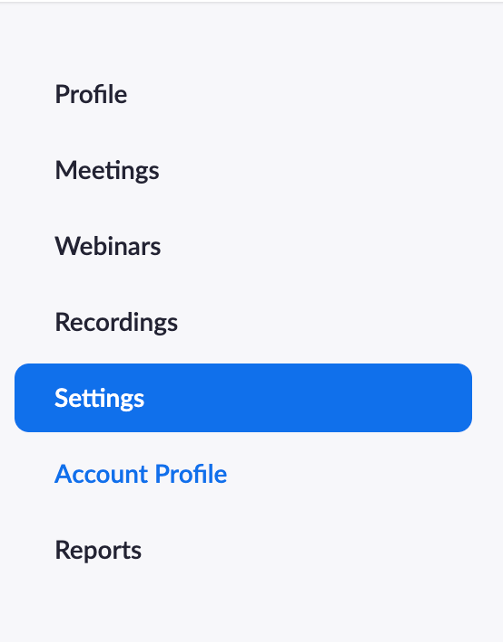
- From the left-side menu, choose Settings.
-
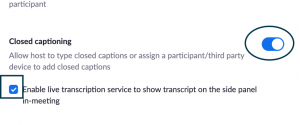
- Next, select the Meeting tab and then select “In Meeting” advanced to find the Closed Caption setting options (alternately, scroll through the settings to find Closed Caption setting options.)

- In the Closed Caption setting, Verify that Closed Caption is enabled. If the setting is disabled, toggle to enable it.
- With Closed Captioning enabled, the option to enable live transcription should appear directly below as “Enable live transcription service.” Check this option to enable live transcription.